


YOUTUBE TUTORIAL LINK: https://youtu.be/ywqJqn1DWHI
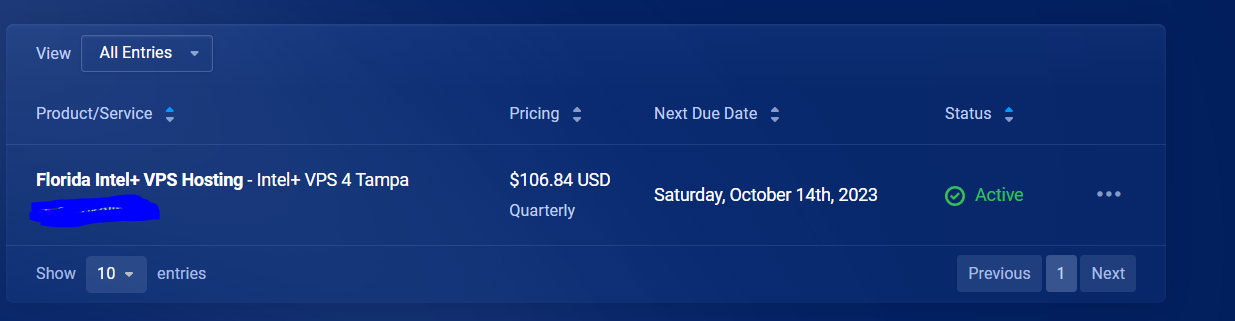
Step 1: Log In to the goodleaf client area and choose the VPS (in the ‘Services’ list)
First, log in to your Control Panel from https://billing.goodleafdev.com/clientarea.php.
Then click on ‘Services‘.

Click on the target VPS server which you want to reboot into Rescue Mode. (if you have multiple VPS servers, please make sure that you select the appropriate VPS instance.)
Step 2: Choose Rescue Mode
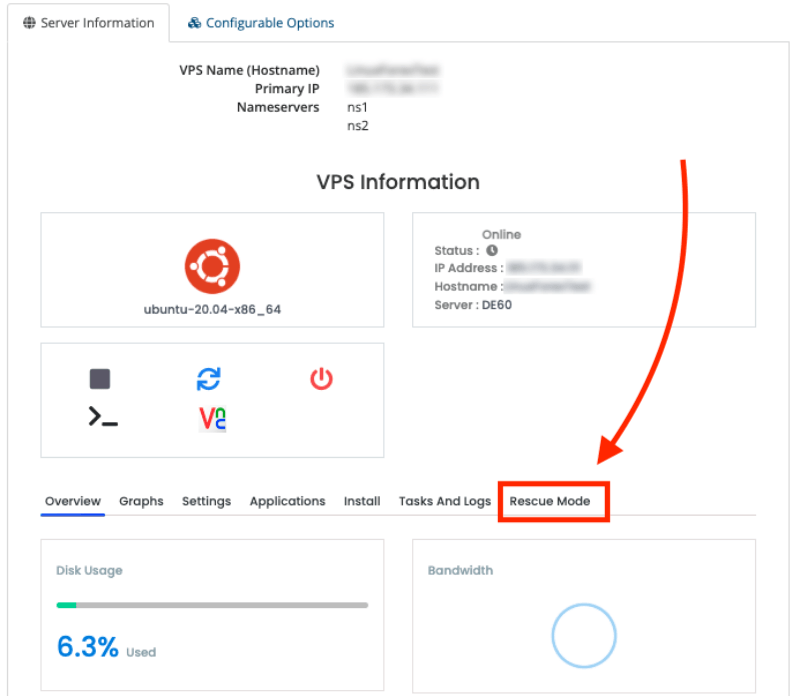
Choose the ‘Rescue Mode‘ just like the picture above
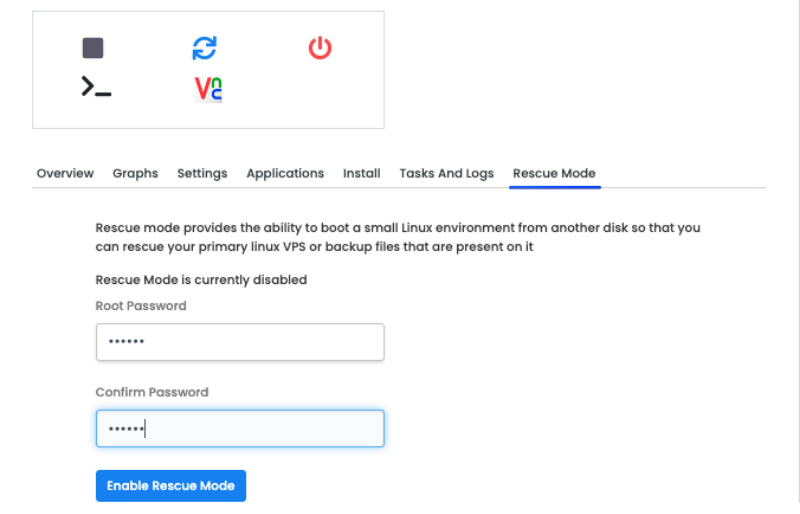
Step 3: Enable Rescue Mode
Pick a password for the Rescue Mode. Then, click on Enable Rescue Mode.
Wait until the server reboots into Rescue mode.
It will show you a page like:
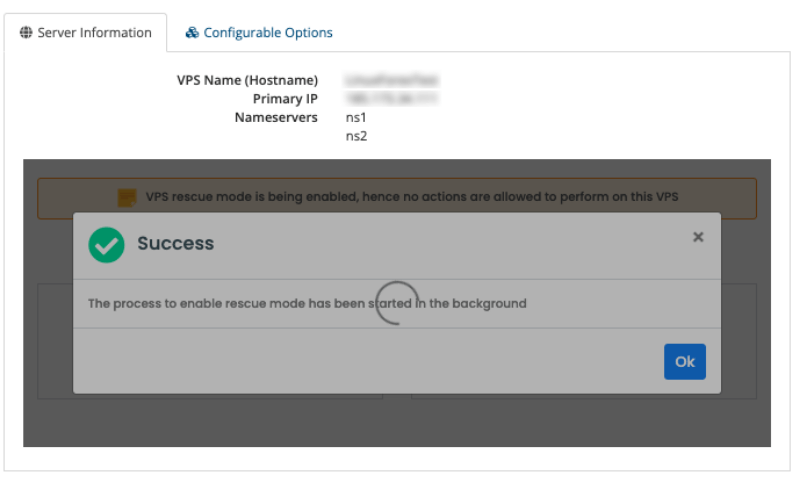
In this step, please wait 2-5 minutes. Then, refresh the page and you will see this message:
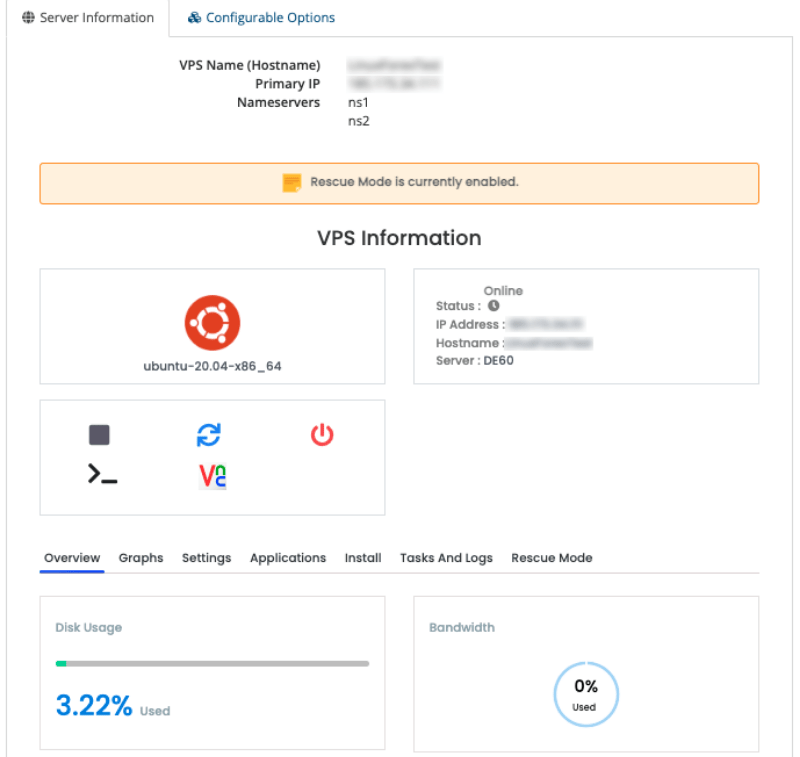
Now the VPS is loaded into the Rescue Mode. The Rescue Mode is Linux based utility for grabbing your data out of the server.
Step 4: Install WinSCP and login to the rescue VM
To transfer the data, you must download WinSCP software, which transfers files between Windows and Linux Operating Systems. So, follow the upcoming steps:
A) Download WinSCP.
B) Install the software and run it.
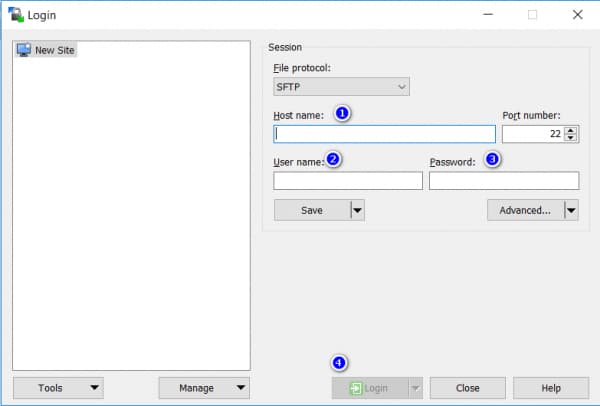
You will see the following window:
- Insert your VPS’s IP address into ‘Host Name:’
- Enter ‘root’ in the Username field.
- Enter the password that you had chosen when you enabled Rescue Mode.
- Click on ‘Login‘
Step 5: Press ‘Ctrl + ‘T‘ keys to open the Terminal
then click ‘OK‘ on the warning message, so a Terminal window opens.
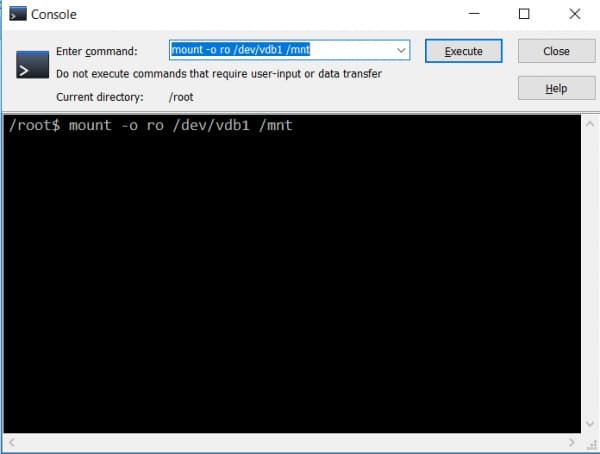
Step 6: Run these commands (in WinSCP terminal)
Pay attention that you must run the following commands in this exact order:
A: apt-get update --allow-releaseinfo-change
B: apt-get install ntfs-3g -y
C: ntfsfix /dev/vdb1
D: mount -t ntfs /dev/vdb1 /mnt
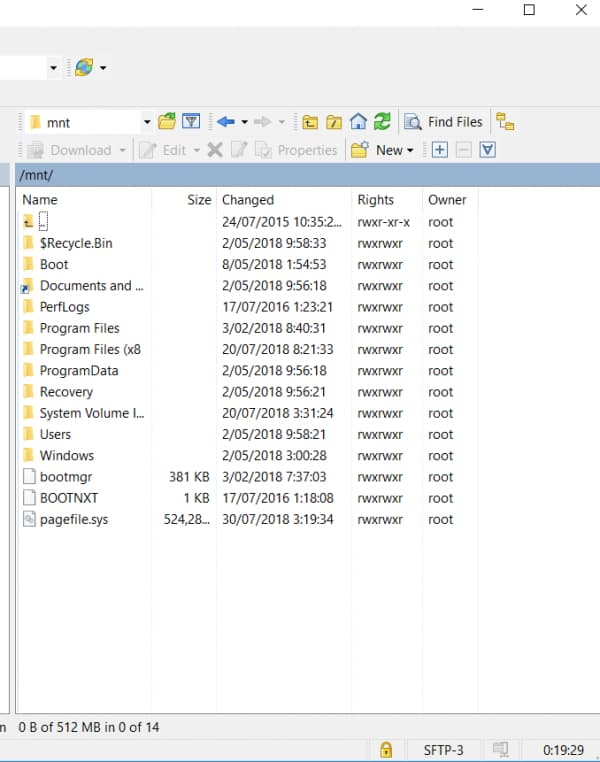
Step 7: Head Over to Root
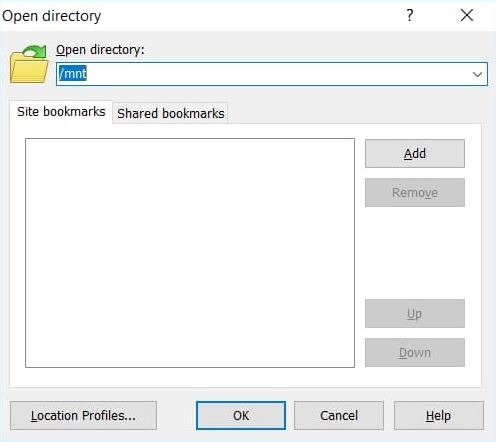
Click on the right panel, then press ‘Ctrl + O‘ so the Open Directory window will pop- up. Write ‘/mnt‘, like in the following picture, and click on ‘Ok‘
Excellent! Now you can see the root page of your Windows drive, which will be like the image below:
Step 8: Download the Files
After doing all the above-mentioned steps, you can go to the folder/location where you have stored your files, right-click on files/folder, and click on download to download them onto your computer.
Some of the common locations you may have stored your files (for Windows VPS) are:
/mnt/Users/Administrator/Desktop
/mnt/Users/Administrator/Downloads
/mnt/Users/Administrator/Documents
After downloading all the files/folders you were looking for, please go back to the VPS control panel and click on ‘Rescue Mode.’ Then, click on disable button and press ‘OK.’


